Check the removal point before pulling
The gasket is the flexible seal around the lid. Before removing it, identify the container model and find its disassembly instructions; a visible ring is not, by itself, permission to pull it out. For a vacuum container, first release the vacuum as its instructions describe.
Some lids provide a deliberate starting point. LocknLock describes detachable silicone and clips on its Glass Top Class lids, including a small gap for removing the silicone. That detail applies to Top Class, not every LocknLock lid.
Once removal is confirmed, use this handling checklist alongside the model’s instructions:
- Record the fit. Photograph the underside before disassembly, including any tabs, corners and changes in the seal’s profile.
- Start where indicated. Use the specified tab or access gap and the maker’s removal method. If you cannot access the seal without digging into it, stop and ask the manufacturer.
- Release progressively. Support the lid and move your fingers along the released edge as you work around it. Avoid pulling the entire ring free from one point or leaving the lid hanging from the seal.
If a section resists, stop pulling and check the instructions again. Do not stretch the free portion to compensate for a section that is still trapped.
Wash the seal and its groove separately
Keep each gasket beside its own lid while cleaning. Start with a soft sponge and dishwashing liquid you already have, provided the product instructions permit them; a special cleaning kit is not automatically necessary.
ZWILLING’s FRESH & SAVE guidance allows hand cleaning with warm water and dish soap. It also distinguishes flat lids, which can go into the dishwasher whole, from lids with an indicator function, which need disassembly first. Use the instructions for your particular lid rather than applying either method to every container.
For a removable seal whose instructions permit hand washing:
- Clean both surfaces. Wash the gasket and the exposed groove, checking corners rather than cleaning only the visible outer edge.
- Rinse separately. Remove the soap and check for remaining food before proceeding.
- Lay out to dry. Leave the lid and gasket apart until both are dry, including the groove. Keep the ring resting loosely rather than hanging it under tension.
This is a conservative handling sequence, not a manufacturer-approved disinfection treatment. Staining or residue that ordinary permitted cleaning does not resolve needs product-specific advice, not an improvised chemical recipe.
Refit without twisting, then inspect all the way around
Check the original photograph and the manufacturer’s diagram before pressing the gasket back into place. Match its orientation and any locating features, then seat short sections without dragging the ring around the groove. If excess material bunches up, lift that section and check the fit rather than stretching the rest to make it disappear.
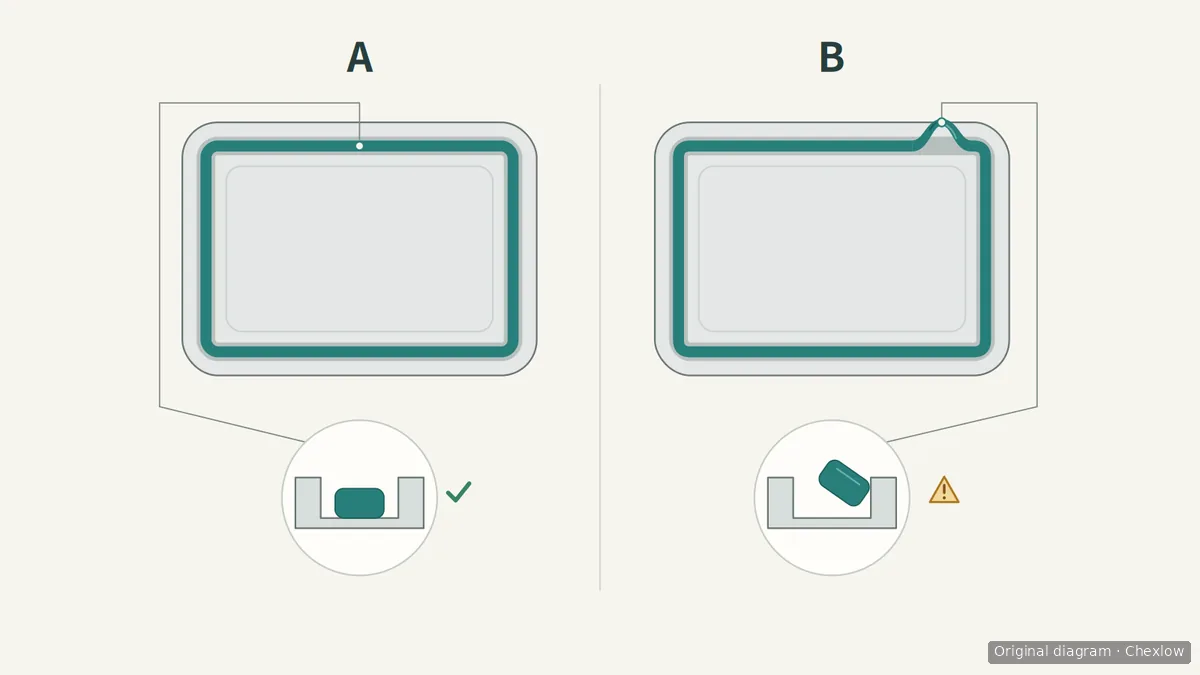
The diagram illustrates an even seat versus a visible twist; it does not specify the cross-section or orientation of your particular seal. A designed lip is not necessarily a fault: OXO explains that POP gaskets have a thin central fin that expands against the container wall when engaged.
Before adding food, inspect the entire perimeter for a rolled section, a raised corner or part of the gasket outside its intended channel. Close the empty container using its normal mechanism. If closure now requires unusual force, reopen it and check the assembly rather than using the clips to push the seal into place.
A visual check does not certify leakproof transport. For POP containers specifically, OXO recommends releasing the seal with the button and carrying the container by its base, not its lid.
Replace a damaged seal with the right part
If the gasket is torn, remains stretched or will not seat after checking the correct orientation, stop the reassembly attempt and consult the maker about replacement. Felli identifies worn or stretched Flip Tite gaskets as replacement cases and lists different shapes and sizes.
The distinction is concrete: that listing separates 4-, 5- and 6-inch square gaskets, a 4 × 8-inch rectangular gasket and a 5-inch round gasket. Even within one product family, one ring is not a universal replacement.
Before buying, match the container family, lid shape, size designation and any replacement-part reference supplied by the manufacturer. Keep a suitable existing gasket; buy a replacement only when needed and when compatibility is established. Similar appearance or the same nominal container capacity is not enough to choose a part.
If a compatible seal or lid cannot be obtained and you decide to replace the whole container, use the glass versus plastic food-container guide to choose for your heating, carrying and cleaning routine.
Comment ce guide a été conçu
This guide was written by AI for Chexlow, using manufacturer pages from LocknLock, ZWILLING, OXO and Felli. Product-specific statements are distinguished from a conservative editorial handling checklist; the guide does not report hands-on testing or establish a universal removal, disinfection or leakproofness procedure.
Original SVG diagrams created for Chexlow